

Italian Rice Balls “Arancini Siciliani”
This post may include affiliate links, meaning I will earn a small commission if you purchase through my link. Affiliate Disclaimer.
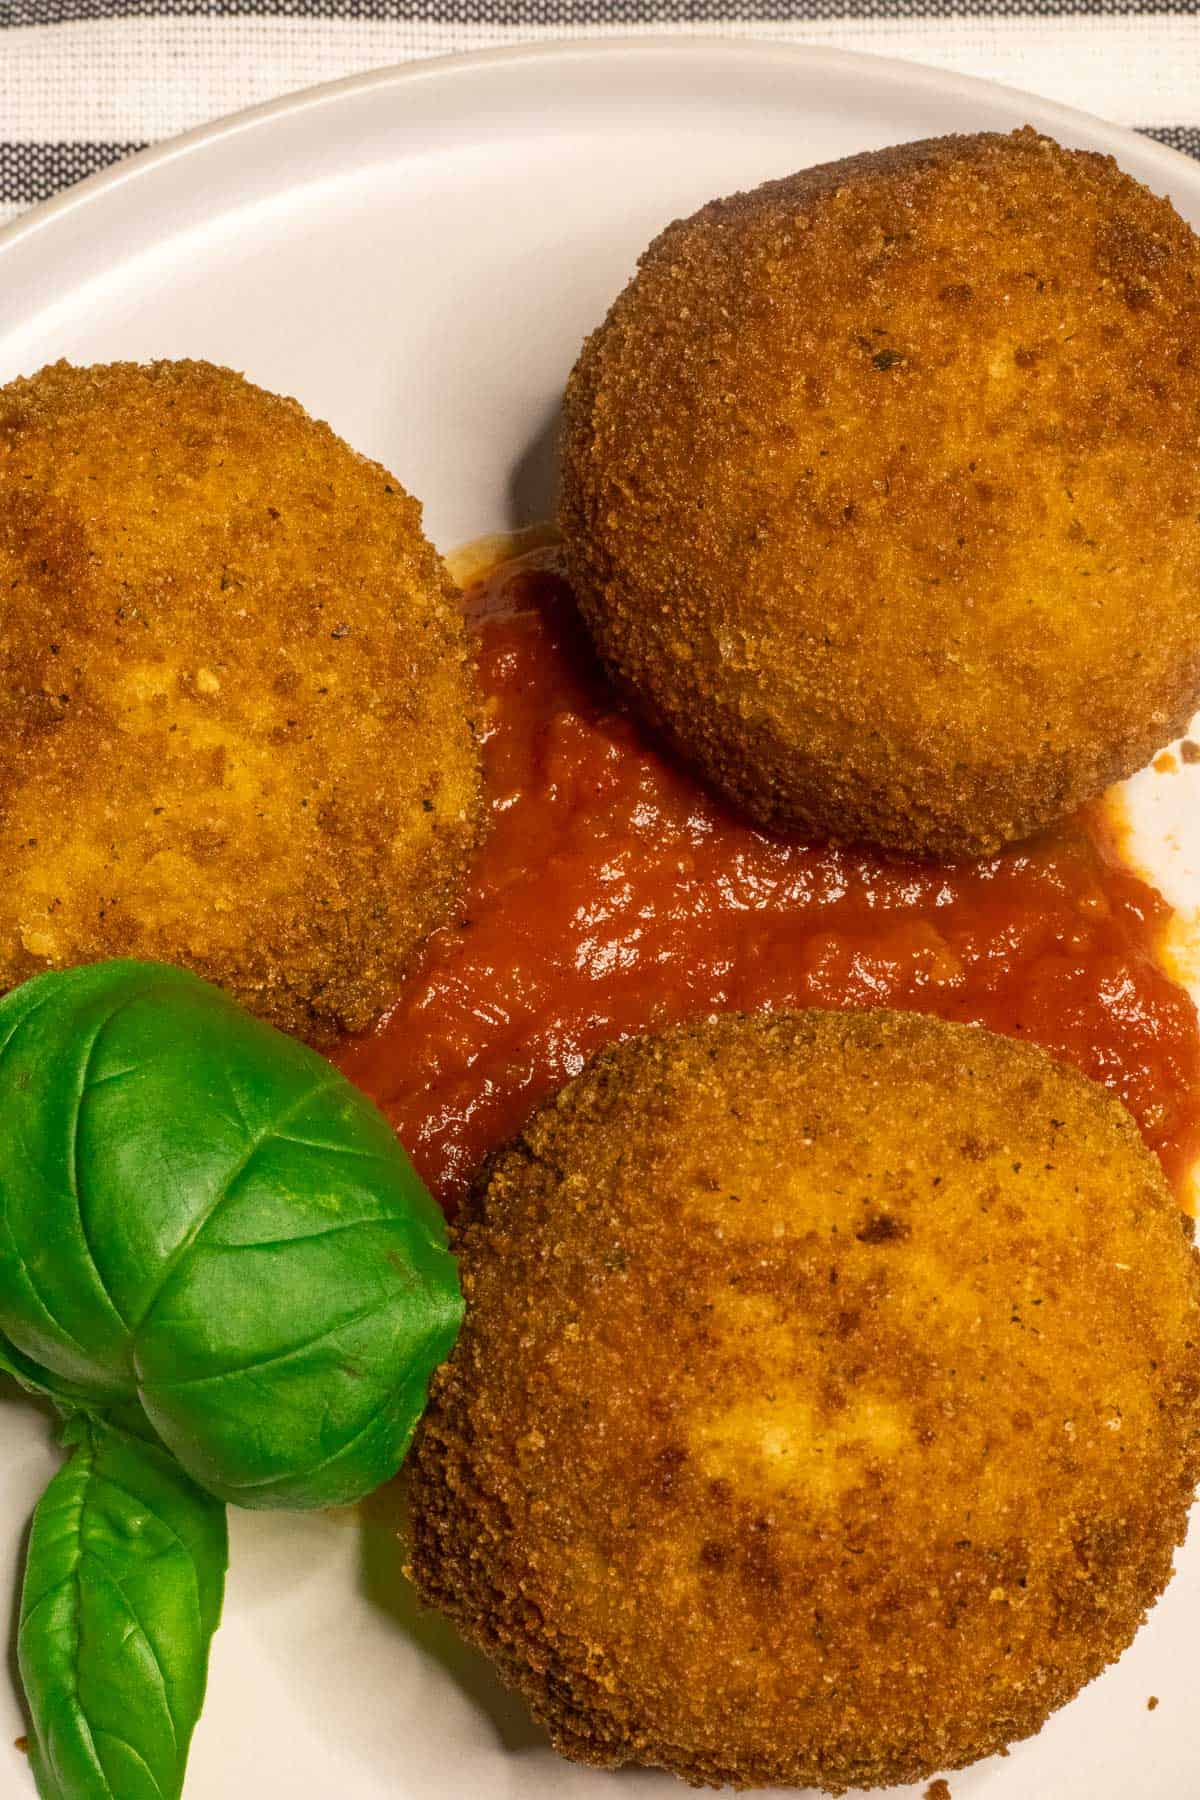
Arancini Siciliani, also known as Italian Rice balls, are stuffed with a meaty sauce and mozzarella cheese, covered in a crunchy breadcrumb coating, and fried to golden brown perfection! At one time, you had to go to Italy to get this Sicilian specialty, but thankfully, today, they are available all over the world.

Italian rice balls are my son’s favorite appetizer/snack food. He doesn’t miss a chance to have them if they are on the menu, and in his opinion, this arancini recipe is one of the best he has ever had!
What are Arancini Siciliani?
Italian rice balls get their name from the Italian word for little oranges, “Arancini.” They are a popular Sicilian specialty of breaded fried rice balls with a meaty, cheesy center.
These fried rice balls are a classic Italian treat usually made on special occasions, similar to Pasta con le Sarde, Pizza Rustica, Italian Easter Bread, and Sfingi. But in Sicily, they are also a very popular street food that can be enjoyed all year long.

There is a great debate between the Eastern and Western parts of the Sicily as to the proper shape of of these cheesy rice balls. In Palermo, arancini are round, and in the eastern cities of Catania and Messina, they are cone-shaped, which is inspired by Mt. Etna. Since I am from Palermo, I favor the round shape!
Rome has its own version of Italian rice balls. In the Lazio region, they make a fried rice ball that is known as Suppli. It is oblong in shape and has cheese in the center.
Another stuffed and fried Italian favorite is a treat called Sofficini (Ham and Cheese Pockets). They are not an ancient recipe like Arancini, but they have become a very popular snack, especially among young people.

Ingredients and Notes
- Bolognese Sauce – This is the typical meat sauce that is used to fill the arancini. Here is the recipe for my Bolognese sauce. This recipe makes more than you will need for the Arancini, so I freeze the rest or plan to use it for dinner within a few days of making it. If you don’t want a meat filling, use Marinara sauce instead.
- Peas – I use frozen peas because I always have them on hand and I don’t need to worry about whether they are in season. You can use fresh peas if you have them available.
- Mozzarella – Use whole milk or part-skim milk mozzarella cut into ½” cubes.
- Arborio Rice – Arborio or risotto rice, works well because it gets sticky and will hold together nicely. This is a short-grain rice that is traditionally used in Sicily for arancini. You will also see it commonly used in risotto recipes like my Butternut Squash Risotto.
- White wine – You can use any white wine you like. I use Chardonnay because I like the flavor but feel free to use what you have on hand. Or you can leave it out altogether and use chicken broth in its place.
- Shallot – Dice the shallot as small as you can. You can use garlic if you don’t have shallots or just leave it out entirely.
- Chicken Broth – or Stock. It is not necessary to use homemade. Store-bought broth works well.
- Parmesan cheese – Grated not shaved.
- Eggs – The eggs will need to be beaten.
- Flour – All-purpose flour is used to coat the rice balls.
- Vegetable oil – You will need enough to fry the arancini in.
Step By Step Instructions

1. Make the Risotto
- Saute the shallot in hot olive oil in a saucepan set over medium heat.
- Add the rice and cook, stirring constantly, until the rice is completely coated in oil and is translucent. Carefully stir in the wine and cook until the wine is completely absorbed.
- Add one cup of chicken broth and stir constantly until the broth is absorbed.
- Repeat this by adding the broth a ladleful at a time and stirring constantly until all the broth has been absorbed.
- Pour the rice onto a rimmed baking sheet and spread it out evenly. Cover it with plastic wrap and refrigerate it for at least 2 hours or overnight.
2. Prepare the Bolognese.
- Heat the Bolognese sauce and add the peas. Bring to a simmer and cook until the peas are heated through.
Cooking Tips
I find it best to make the rice and meat sauce the day before you assemble and fry the arancini. This makes the process go much faster.
To make things easier, you can use leftover rice and bolognese sauce or use a good store-bought sauce.
Your rice should be cooked to al dente so, it is not mushy.
Place the rice in the refrigerator and allow it to cool for several hours. The cold risotto will stick together and mold better when you are forming the rice balls.

3. Assemble the Arancini
- Mix the risotto with a beaten egg and the parmesan cheese.
- Prepare the dredging staging with 3 shallow bowls of beaten egg, flour and breadcrumbs.
- Wet your hands and place a heaping tablespoon (ice cream scoop) of rice mixture in the palm of your hand, flatten the rice out and add one teaspoon of Bolognese and a piece of mozzarella in the center.
- Cover the rice with another tablespoon of rice mixture.
- Form it into a ball, seal the filling completely, and set aside. Repeat this process with the remaining ingredients.
- Roll each ball in the flour, coat it completely with the egg, and then the bread crumbs.
Cooking Tip:
Wet your hands before forming each rice ball. The water will keep the rice from sticking to your hands, allowing you to form and seal the ball more securely.

4. Fry the Rice Balls in Hot Oil Until Golden Brown
- Heat the oil to 350F degrees. You can use a deep fryer or shallow fry them in a deep skillet. If you are shallow frying them, you should have enough oil in the pan that it goes halfway up the rice ball.
- When they are golden brown on all sides, use a slotted spoon to remove them from the oil and place them on a sheet pan lined with paper towels.
Cooking Tip:
The oil you fry the balls in needs to be hot enough to fry the balls to a golden brown. Just be careful that the oil’s temperature is not too hot. If it’s too hot, the rice balls will brown too quickly, and the cheese in the center won’t get hot enough to melt.
What Do You Serve with Italian Rice Balls?
These crispy rice balls are a great appetizer or party finger food. In Italy they are eaten on their own. But in Italian restaurants they are often served with a side of tomato sauce for dipping them in. You can even serve them as a main course with a side salad.
Variations
The most common filling is probably meat sauce with peas and mozzarella. But there are many variations of Arancini di riso, or risotto balls, in Italy. In Catania you may find them made “alla Norma” with an eggplant filling, in other parts of Italy you might find them made with prosciutto and cheese or with a bechamel sauce.
FAQ’s
It is best to eat arancini warm so that the crust is crunchy and the cheese in the filling is gooey and melted. They are just as good re-warmed as they are when they are freshly cooked.
Place leftovers in an airtight container or a plastic bag and refrigerate them for up to 4 days. They can be reheated in a 350F degree oven for 15-20 minutes.
Yes. Arrange rice balls in a single layer on a cookie sheet and place them in the freezer for about an hour. This will keep them from sticking together. Then they can be transferred to a plastic freezer bag and frozen for up to 2 months.
The origin of Arancini Siciliani dates to 1646, when a grain ship arrived in Sicily during a time of great famine. The ship arrived on St. Lucy’s Day, so Sicilian rice balls were a traditional food served to celebrate the saint’s feast day for many years.

Other Sicilian Specialties to Try
One of our favorite Sicilian appetizers is Homemade Sicilian Caponata. This is a flavorful eggplant dish that is delicious served with fresh Italian breads like Easy No Knead Focaccia.
A very popular stuffed bread is Stromboli. This is a crowd-pleaser, for sure. The great thing is that you can stuff it with your favorite Italian meats and cheeses.


I love to get your feedback so if you tried this Italian Rice Balls “Arancini” Recipe or any other recipes on this website, please leave me a comment below. I hope you enjoy our recipes and look forward to hearing from you!
You can also follow me on Facebook, Instagram and Pinterest for more recipes your family will love!
Italian Rice Balls “Arancini Siciliani” Recipe

Italian Rice Balls “Arancini Siciliani”
Want to Save This Recipe?
Enter your email & I’ll send it to your inbox. Plus, get great new recipes from me every week!
By submitting this form, you consent to receive emails from Enza’s Quail Hollow Kitchen
Equipment
- 1 skillet large, deep for frying or
Ingredients
- 2 tbsp Olive oil
- 1 tbsp Shallot diced
- 2 cups Arborio rice or other short grain rice
- ⅓ cup White wine
- 3½-4 cups Chicken Broth
- 1 cup Parmesan cheese grated
- 3 Eggs large, divided
- 1 cup Bolognese sauce
- ¼ cup Peas frozen or fresh
- ½ cup Flour all purpose
- 1 cup Bread crumbs seasoned
- 2-4 oz Mozzarella cheese cut into ½" -¾" cubes
- Vegetable or Olive oil for frying
Instructions
Make Risotto
- Heat olive oil in a medium saucepan. When the oil is hot add the shallot and sauté until tender, about a minute. Stir in the rice and cook stirring constantly until all of the rice is coated in oil and is translucent, about 2 minutes.
- Stir in the white wine and cook until the wine is completely absorbed. Stir the rice constantly.
- Add 1 cup of chicken broth and stir until the broth has been absorbed. Continue to add chicken broth 1 ladleful at a time making sure the liquid is absorbed between additions and continue to stir constantly so the rice does not stick. Cook until the rice is al dente. Add salt to taste if necessary. Remove from the stove and let it cool down for about 10 minutes.
- Transfer the rice to a rimmed baking sheet and spread it out evenly. Refrigerate for at least 2 hours and up to 24 hours.
Make the Bolognese and set aside until ready to assemble the rice balls
Assemble and Fry
- Transfer the cold rice to a large bowl and combine with 1 beaten egg and the parmesan cheese, mixing well.
- Add the peas to about a cup to 1½ cups of Bolognese in a small saucepan and cook until the peas are heated through.
- Wet your hands. Using an Ice cream scoop or a tablespoon, scoop the rice into the palm of your hand. Flatten out the rice. Add a heaping teaspoon of Bolognese and a cube of mozzarella in the center of the rice. Cover with another scoop of rice and mold it to form a ball. Make sure to secure the filling inside the rice. Set aside and repeat the process with the remaining ingredients.
- Set up a dredging station with 3 shallow bowls. Place the flour in one bowl, the 2 beaten eggs in another and the bread crumbs in the third bowl.
- Roll one of the rice balls in the flour, coating completely and dusting off any excess flour. Then roll it in the egg, and lastly in the breadcrumbs and set aside. Repeat this with the remaining rice balls.
- Heat enough the vegetable or olive oil in your skillet or fryer. If using a skillet you need enough oil to come half way up the side of the rice balls. When the oil reaches 350℉, it is ready.
- Add 5 or 6 rice balls to the oil and fry until the breading is golden brown, then flip them over. When the rice balls are done, use a slotted spoon to transfer them to a baking sheet that is lined with paper towels.
- Serve the rice balls warm. You can serve a side of tomato sauce with them if you like.
Notes
- I find that it is best to make the rice and the meat sauce the day before you are going to assemble and fry the arancini. This makes the process go much faster.
- To make things easier, you can use leftover rice and bolognese sauce or use a good store-bought sauce
- Follow this link for my Bolognese Sauce recipe. The recipe makes a lot more sauce than you will need for this recipe, but you can freeze or refrigerate it and use it for dinner within several days of making it.
- Your rice should be cooked to al dente so that it is not mushy.
- Place the rice in the refrigerator and allow it to cool for several hours. The cold risotto will stick together and mold better when you are forming the rice balls.
- Wet your hands before forming each rice ball. The water will keep the rice from sticking to your hands and you will be able to form and seal the ball more securely.
- The oil you fry the arancini in needs to be hot enough to fry the balls to a golden brown. Just be careful that the temperature of the oil is not too hot. If it is too hot, they will brown too quickly, and the cheese in the center will not get hot enough to melt.
Aiuto. My arancini are falling apart. Can they be saved before I try frying them?
Maria
I am sorry that I just saw this. I don’t know if you’ve already tried frying them, but if your arancini aren’t holding together, the risotto is either too wet or they need to sit in the refrigerator longer. You can try adding a little more breadcrumbs to them and refrigerating them for 30 minutes to an hour, or refrigerate the risotto for an hour to cool and set before you try forming them again.
I hope this works for you.
Enza
Really good.
So glad you liked the Arancini John. My son’s love them too.